 |
||||
| Mod: Backup lights on the bumper | ||||
First of all, i want to thank Pop Up Camping In North Carolina for all the help. These instructions are to be used as a guide and may need to be modified for your camper. If i can, i am willing to help in anyway possible... just send me an email.
Before beginning, nccamper provided me with alot of electrical information. I have included that information here.
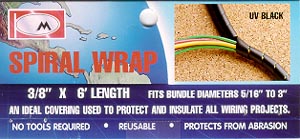
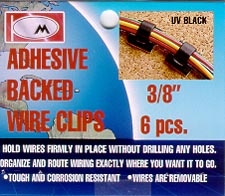
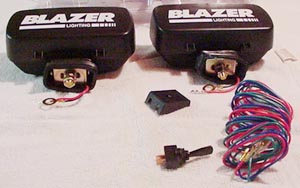
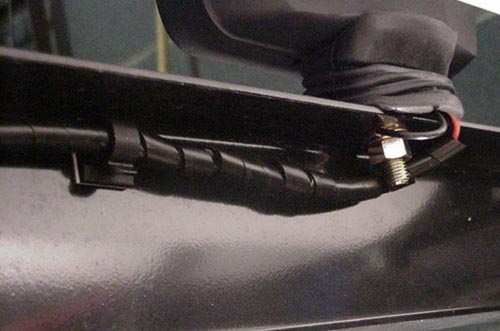
The fog lamp kit i purchased came with all necessary wiring, switch, 15 amp inline fuse and two 55 watt Halogen lamps. I don't know much about DC wiring, but i have been told the inline fuse is a must as it protects the circuit. This set of lamps will pull 9.2 amps (55 watts x 2 = 110 watts / 12 volts = 9.1666 amps). The Spiral Wrap, Wire Clips and wire ties are in the same department as the fog lamps and are not required to complete the installation.
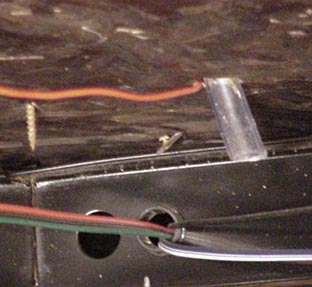
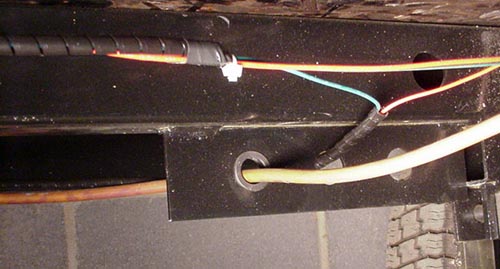
Next, instead of drilling another hole, look for an existing hole through the floor of the camper. I was able to use the hole for the water tank drain. Run the hot wire through the hole. Crawl underneath the camper and pull wire through existing holes in the frame. Look for existing groups of wiring and run the hot wire with them. Pull the hot wire to the switch location. I placed my switch on the frame on the fresh water inlet side of the camper.
If lamps were temporarily mounted, unmount them and mark the permanent location on the back bumper. Drill holes for switch, lamps and then bolt everything into place. I used a regular drill bit to drill through the metal. Don't try to force it - let the drill do the job. Be sure to read the instructions included with the lamps. Fog lamps are made so that the water will drain out and you may need to turn the bulb housing over if you are mounting them on the underside of the bumper.
The next step is to determine a wiring path and place the Spiral Wrap on the wires. The Spiral Wrap is not necessary, but it protects the wiring and adds a nice finishing touch. It is much easier to put on the wires before everything is hooked up. To determine the wiring path, i laid all of the wires on the ground in the location they would be on the camper. Then i looked for existing holes on the camper frame. Instead of cutting the wires to length (making them shorter), i doubled the wire up and wrapped the excess with electrical tape.
After determining the wiring path, wrap the wires in Spiral Wrap and begin feeding them through the holes on the camper frame. Hook wires up to lamps and switch. Use the adhesive backed wire clips to attach the Spiral Wrap to the camper frame. I used wire ties to attach the hot wire to the other group of wires.
NOTES:
 Click on the links below for more photos.
|
||||
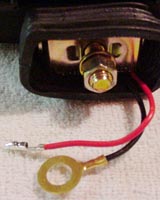 Begin by either mounting the lamps on the bumper or find a couple of holes to temporarily mount the lamps so they will be grounded. Connect all wiring before beginning the search for a power source. Remember, the lamps must be mounted or grounded before testing them. The lamps that i purchased are grounded by placing the bolt through gold ring (black wire coming from the lamp) before attaching the lamp to the frame of the camper. My camper has two holes located on either side of the step and i used them temporarily.
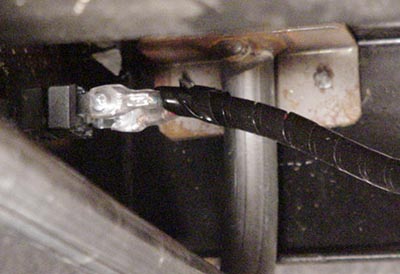
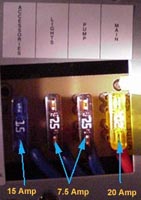 Locate the fuse section in the converter box and see which fuse is rated 10 amps or more. My fuse section has four fuses and i chose the Accessories (15 amp) fuse. While looking for the correct fuse, keep in mind that you want these lamps to run off your 12 volt battery and 110 power. Here is where the funs begins. Look at the back of the converter and you should see three or four wires coming directly from the converter (mine were coming from the right hand side). These wires should be connected to other wires with wire nuts. The other wires are going to your lights, detector, etc. If your pop up is made like mine, none of the wires are labeled and you will need to use the process of elimination or a schematic. I eliminated two fuses by just tracing the wires. Unscrew one of the wire nuts, add your hot wire to the mix and replace the wire nut. Power up the camper and flip the switch for the lights. If a fuse is blown, you now know which circuit you are on. If the lights stay on, pull the fuses until you find out which one you are on. This all sounds complicated, but it only took me a few minutes to find the Accessories circuit. Disconnect camper power.